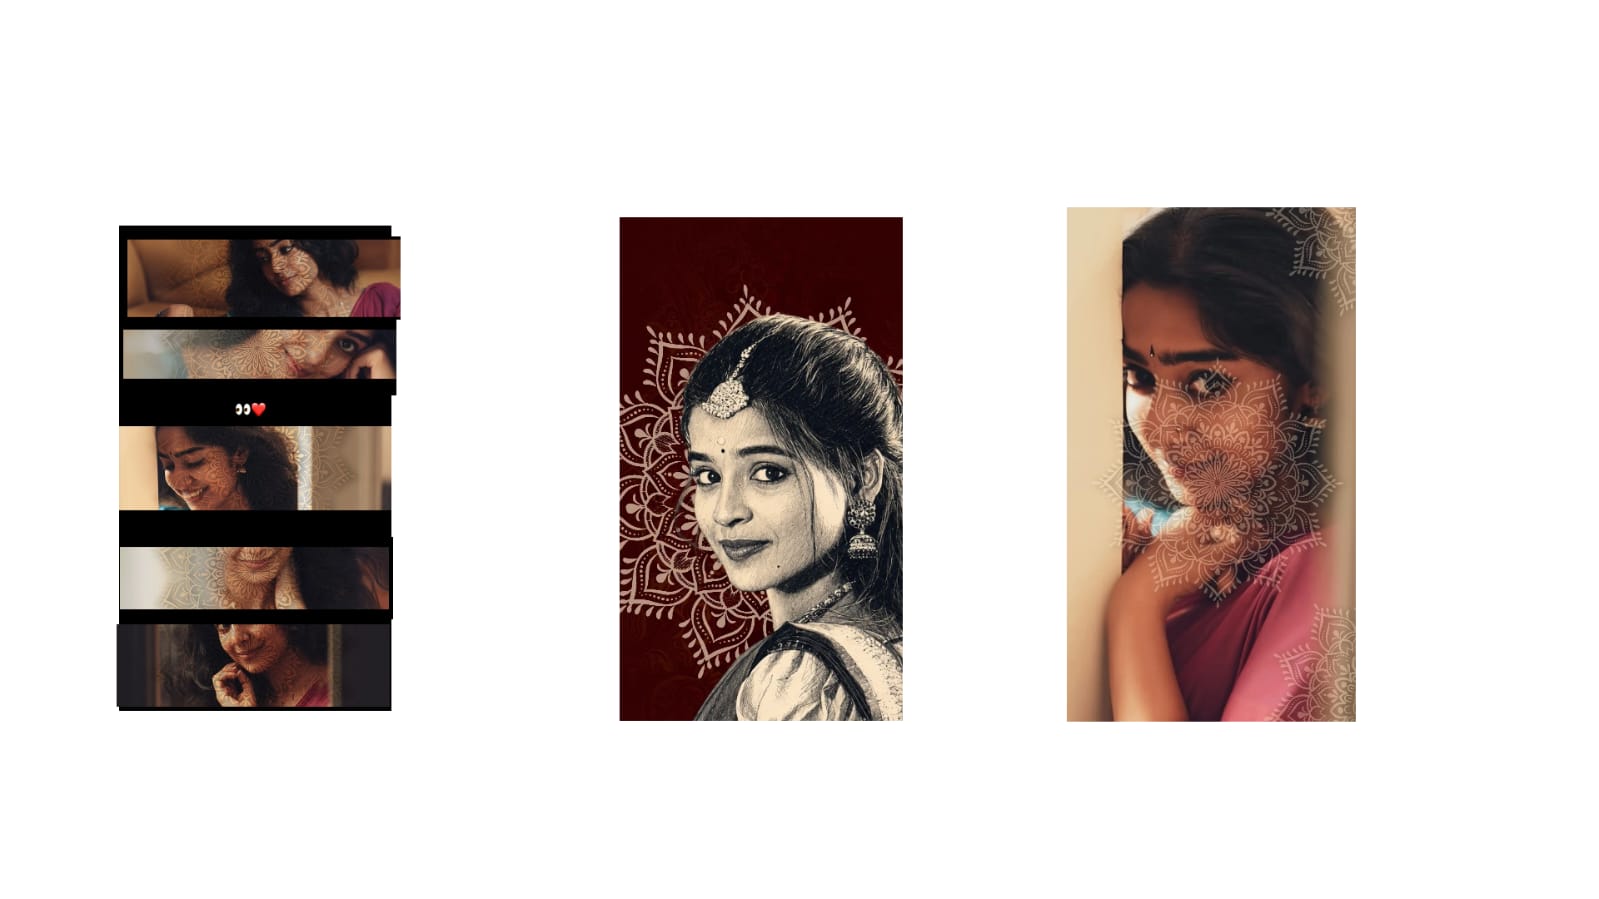
First, observe these two videos carefully. We are going to make these two videos right now. We are going to do this very simply and easily right on your mobile phone. People usually make these kinds of videos in After Effects or Premiere Pro, but now we will do it on mobile. It is very simple. I will explain it in a very short amount of time. If you watch this, you will get an idea. This will be at the next level of trending on Instagram. I am getting only these videos in my suggestions, and my comments and DMs are flooded with them. Especially, many people sent me one particular video and asked me to recreate it. Let’s try it in a simple way. If you like it, please hit the like button. Especially if you are a mobile editing lover, you must try this video. You don’t need to go to after effects. The main important thing is that along with the AI photos, we also need the Alight Motion app for editing. If you don’t have the Alight Motion app, it is available on Telegram and WhatsApp channels. Check it out. It is a mobile app, and you can use it easily on your mobile phone.
First of all, the most important thing needed for this is that we need to generate photos for it. It’s also great if you have your normal photos—any photos you took in a photoshoot can be used happily. But even if we use our photoshoot pictures, we won’t get that specific look. Definitely, we must generate some photos using AI, and we also need some backgrounds. In a very simple way, I will give you only two prompts. These two prompts are very important. First, to generate this photo, open ChatGPT. For example, I put a normal photo first. This is a normal photo. It doesn’t matter if you have a photo like this or not because you can mention it here. For instance, when I provided this photo, it generated a photo like this for me. It looks very professional and wonderful.
When you see it, don’t just think it is in some color; there is a lot of depth in it. Because when we edit, whether we want it in black and white or some other color, these types of photos will be very useful. I will tell you why later. I will provide this prompt below in the description, so check it out. The second prompt is another one I did earlier. This prompt will be next-level; consider it my favorite prompt. You can’t even expect how useful this prompt will be. It is very important, so it is a long prompt. It took a lot of time because I made many changes to set it up. This is a normal photo. When I provided this photo, it generated a picture like this. You can make some minor changes to it. The quality is very good.
The colors in it are excellent. If I explain all the details now, it will waste a lot of your time. So, whatever details are there, just take a look at them. If you want to change any colors or anything, you can change them very easily. It won’t be a big trouble. Based on that, you will have an idea, right? You can make changes according to that. I will put both prompts in the description, so check them out
First, look at these photos. I have downloaded them. I will download the second photo now. Now I will tell you a few things inside ChatGPT itself. For example, when we edit, if you observe those videos closely, there will be eye-opening and closing shots. In a video clip, that’s fine because we have natural motion in a video clip. But we don’t have that motion in a photo. If we use an eye-closed photo, it stays closed. If we use an eye-open photo, it stays open. So, for example, I have this photo that I downloaded. I also need a close-up shot of this same photo. Let me tell you how. I will take a new project and add this same photo here. After adding it, for example, the photo size and everything will be correct. I am just creating a photo with closed eyes in the same size. I am just showing you this as an example. The photo size, hands, and everything should remain the same, but we need the eyes to close and open. We already have the eye-open photo, so we are generating another photo for the closed eyes
This is useful because we are going to do the whole thing using just photos. If you try it with video, it might be even better and look great, and you can continue with that. But when doing it with photos only, watch how I speed up the video a bit here. See, it is the same photo and the same size, but it is a bit of a close-up. Only the eyes are close-up; everything else is the same. You need to generate photos like this. Now, this is fine. I am copying this text. Since I need another photo too, I am taking a close-up for this one as an example as well. These are very important to me. I am not saying you only need two; I am just showing you two as an example. You can continue with the rest. I will fast-forward this part of the video a bit, take a look.
Okay, our second photo is also ready. Look here, the pose is the same, and everything is identical, but it is just a bit of a close-up. Not just this, if you want to change the hands or make them look a bit different… I mentioned the eyes because I felt only the eyes were important. If it is a dance pose, there will be hands or something else, right? You can make changes according to that. I hope you got an idea. To give you an idea of what I used, I will explain a few things. For example, first, I downloaded some normal photos from the Pinterest app. I downloaded two or three, actually a bit more. Having one or two is no problem. After that, one photo is enough for the rest. We just need a reference image, and we can automatically generate the remaining prompts using the process I explained earlier.
According to that, look here. Let me tell you one thing now. For example, in this project as well, I have some close-up shots of photos. For instance, the eyes are closed here, and there will also be a normal photo here. Look here, it goes from closed to open.
So I didn’t just stop at one photo, because if you observe those videos closely, you will get an idea. I will post the demo video on Telegram, WhatsApp, and Instagram as well, so check it out. There are many background photos, and I have added them to the description. I only put what is useful for you. You can download them. Finally, I have also given the final project file. Now let’s start editing. I will take very little time and explain only a few things, and you can do the rest automatically.First, I will show you the breakdown video I made so that you have an idea of how to do it. In this breakdown video, there are 100 layers. There is one music track, so there are 99 layers, and the rest is the camera. I used a camera in this, and the camera movement comes at the end. We don’t strictly need the camera, so it’s fine even if you hide it. I just used it because it might be needed a little at the end. Now you don’t need that camera at all.
Look at how the videos appear; you can see it here. Take a little time. Now let’s leave the breakdown aside, as I have given the project file. Check it out. First, we are selecting the 9:16 aspect ratio in the Alight Motion app. If you don’t have the Alight Motion app, I have posted it on Telegram and WhatsApp, so check it out. First, select the plus icon at the bottom and choose the 16:9 ratio, or you can take any other ratio in the Alight Motion app.
Now our ratio is set. First, let’s add the audio. If you don’t have the separate audio but have a video clip, you can select the video, click the three dots, and choose ‘Extract Audio’. Keep that video as it is; it will be very useful as a reference. Keep that video because even I—you might think I just watched another video and copied it—but I did it in our style. You can make different videos too. I never think of it as pure copying. When we have certain thoughts, even a great director like Rajamouli sir takes some scenes as inspiration from Hollywood movies. The idea of ‘copying’ never comes to my mind; I take it as an inspiration.
If you have doubts about copying, let it be, no problem. Okay, now we have added the video and audio. If you have separate audio, you can add it from your album or songs. After that, as I told you before, we need the photos. What I will do with this video is keep it as it is. Go to the plus icon, then media, and first add the photo we generated. This photo.
After adding this photo, first, listen to the beat. Where is the beat? It is up to this point, so extend this photo up to here and zoom in a bit. At first, I am not showing the eyes; I want to show the lips first, so I placed it in the center like this. I placed it exactly in the center. Tap the plus icon at the bottom and take a rectangle shape. Go to ‘Edit Shape’, select the X and Y options, select X, and increase it like this. Keep it up to the beat mark.
The beat mark is very important. Select from where to where you want it. There is no rule that you must use the exact timing I mentioned; it’s your choice. You can set it shorter or longer, just listen to the beat. Now go to ‘Edit Shape’ again, select Y, and make it completely zero. Now it is not visible.
Now we have a small plus icon here which works like a keyframe. Add a keyframe, move forward a bit, and increase the size slightly like this. At first, nothing is visible, then it appears. After that, if you want to increase it further, do it like this again. Don’t increase it too much, this is enough. I will place them close to each other because the beat is quite rapid here. Check the beat here. See, it’s not here, it is up to this point. You can use your finger to adjust it to this side or that side as you like.
First, it reveals slowly, and then it adjusts according to the beat. Go in between the keyframes, open the curve options, and make the curve fast. It looks better if it’s fast. Then at the end, this needs to be a complete close-up, so select Y again and close it up completely. The shape is now created.
Full Project
XML file
download
Song link